
Setting up a ring light might seem like a simple task at first, but there’s actually far more you could probably be doing to get the best out of your equipment. If you want that extra advantage when taking photos or shooting video, we here at Gear Nuke can help out.
It doesn’t matter whether you’re a first time user or someone who’s been self-teaching for a few years. Here’s how to properly set up your ring light to get the best and most beautiful shots possible.

Environment is key
Before you even turn on your ring light, you need to make sure you have a well planned shooting area. Block out any intrusive light that will wash out the glow from the ring light and be sure to place your ring light in a location where it can be moved to accommodate any future adjustments that may be needed, e.g. don’t place it flat against a wall.
You’ll naturally need to be aware of whether you need a power outlet near your location, too, if your ring light cannot be USB powered. Making sure you take care of the area that you plan to shoot in is a huge part of the fight won straight away.
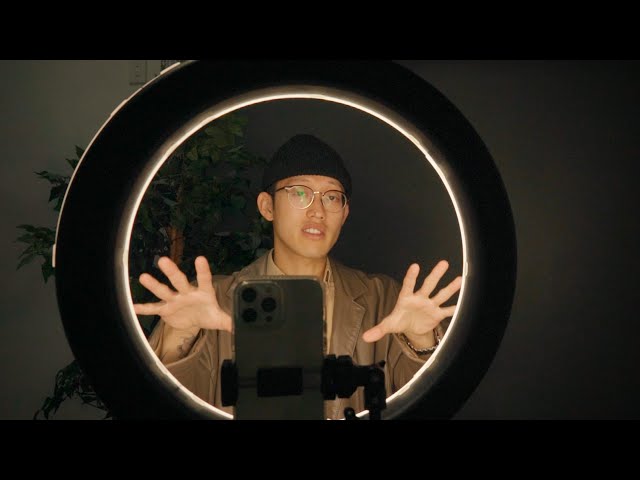
Place your phone or camera centrally
Next, you want to make sure your smartphone or camera are placed in the middle of the light. Many ring lights will already support this but be aware that some products still might not include the extension or grip that is required to achieve this.
Alternatively, you can use a seperate tripod or vice grip to attach it, or line it up with, the centre of the ring light. Capturing content from any other angle is going to lead to the light being distorted in all of your images and defeats the purpose of a ring light entirely.
Set your brightness/temperature
Once your position is set, here is where you can start playing with the ring light and its settings. Use whatever features are at your disposal and try and gauge how various lighting temperatures will affect your shooting environment.
You can place a subject in front of the light to better understand how the light will interact with what is in front of the camera, which brings us onto the next point.
Check, confirm, and check again
Always check your framing and what reflections could potentially cause issues before you dive deep into capturing content. The last thing you want is to record footage only to realize afterwards that there was an issue that could cause a reshoot to be necessary.
This is easier with two people, as one can check the framing while the other is in focus. But even if you’re alone you can take test shots or record mini clips to make sure everything is in order. This is a great habit to get into even if you’re using the same location over and over.
Minor adjustments and confirmation
By this point you should be 99% there when it comes to having your ring light set up and only minor tweaks will be necessary. It could be that your angles need adjusting by a few degrees or the warmth of the light needs to be ever so slightly increased or decreased.
Either way, you need to try to not obsess over the finer details at this point and understand that minor adjustments can still be made throughout your shoot and it’s entirely normal.